Showing posts with label Christening. Show all posts

Sunday, 27 August 2017

Emma's Baptism Card with Clearly Besotted

Beginning of August we attended my cousin Zia and her husband's little baby Emma's baptism. Of course I made the card myself including the gift bag for the present. 

Baby Emma was such a joy all day long and she was super charming in church. She certainly did her best to charm the socks off the priest. 
 

The gift bag is made using the Envelope Punch Board from We R Memory Keepers. 
How to make this extra large gift bag - it's the full size of two 12"x12" cardstock pieces - you can watch THIS video. 


Hugs,
Pia


If you’re interested in the supplies I’ve used – they’re listed below. 
Click on the letters below the images to find where to shop: Hobbyboden.dk (HB), Simon Says Stamp (SSS), Clearly Besotted Stamps (CBS), Original Brand/Manufacturer (OB), Other (MISC) etc. This is a kind service to you as I don't earn anything by doing this.
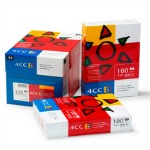


4CC White A4 Cardstock 250 gm2, 200 sheets
Where to shop:
MISC
KRAFT 12x12 Cardstock
Where to shop:
MISC
Create A Smile
Create A Smile "Double Stitched Rectangles" A6 Dies
Where to shop:
OB
Echo Park Bundle of Joy Girl 6x6 paper pad
Where to shop:
SSS
MISTI PRECISION STAMPER Stamping Tool
Where to shop:
HB | SSS
Clearly Besotted
Clearly Besotted "Special Delivery" Clear Stamps
Where to shop:
CBS
Clearly Besotted
Clearly Besotted "Special Delivery" Dies
Where to shop:
CBS
Clearly Besotted
Clearly Besotted "Decorative Tag" Die
Where to shop:
CBS
Memento
Memento "Tuxedo Black" Dye Ink
Where to shop:
HB | SSS
Altenew RED SUNSET Crisp Dye Ink Pad Pack
Where to shop:
HB | SSS
Promarker
Promarker "Baby Pink"
Where to shop:
HB | MISC
Promarker
Promarker "Soft Peach"
Where to shop:
HB | MISC
Promarker
Promarker "Pastel Yellow"
Where to shop:
SSS | MISC

Promarker "Cool Grey 1"
Where to shop:
SSS | MISC
ZIG
ZIG "Glitter Clear" Wink of Stella
Where to shop:
HB | SSS
Tombow Mono Multi Liquid Glue
Where to shop:
HB | SSS
Double sided tape 6mm (6x50m)
Where to shop:
HB | MISC
Sizzix Big Shot
Sizzix Big Shot
Where to shop:
HB | SSS
Martha Stewart Paper Trimmer
Where to shop:
MISC
Martha Stewart Bone Folder
Where to shop:
MISC

Friday, 17 May 2013

Christening Gift - Toy Chest

The other day I was looking through some photos I'd taken a few years back and happened to come accross the photos of the christening gift I made for my brothers second son, my nephew Anton.

This gift is one of my favorite homemade gifts and if it wasn't such a time consuming project I would have made more of them. Perhaps I should mention that this one is actually the second of its kind. My first nephew August also got one - but of course it looked quite different to this one. I never did take any photos if that one to my greatest regret.

But here is Anton's homemade Toy Chest.


I got great help from my sister with the painting of the wicker basket. That was the most time consuming. I could have used spray paint, but couldn't get the exact colour I wanted. I easily took the wicker basket apart as it was gathered with plastic screws (these I afterwards replaced with proper ones) and this made it easier to paint it with a good paint brush.

The toy chest is based on this wicker basket bought in IKEA (L: 68 cm, W: 34 cm, H: 34cm). I honestly don't know if IKEA still sells them.

The chest was filled up with other gifts from my parents, my sister and me as you can see below. I also made a couple of embroidery strips which my mother used to make homemade baby bibs with and I made three baby clothes hangers as well. If you look closely you can see them in the chest. My mother also sewed a set of baby linen for Anton. 


For the lid I sawed out a piece of fibreboard (træfiberplade/sponplade) approx. 1,5 - 2 cm thick. My father always has something usable lying around in the barn at my parents place, so I just have to make a request and... wupti... we find something which can by used. I did though have to go out and buy the hinge. Here in Denmark we call this type of hinge a "piano hinge" (klaverhængsel) and it can be found in different lengths. The good thing about this hinge is that it is very slim, so it doesn't take up much space when the chest is closed.


The top and bottom of the lid I decorated with rub-ons and die cut letters and figures from the Déjá Views "Little Ones" Collection. I used a Sailor Freshly Picked Pastel Collection pen to make the dots illustrating the route of the plane and the waves for the boat. The colour was "warm cream". To protect the decoration and the paint on the wicher basket I gave the whole chest some varnish. For the wicker basket I used varnish in a spray can, but the lid I painted very carefully with varnish. I gave it several thin layers. Wanted to be absolutely sure the chest could withhold the rough life in a childs room.

Well, hope you enjoy my little tour-de-toy-chest project. I know I haven't given you a very detailed decription of how I made this toy chest, so feel free to ask my any question you might have.

By the way, the photo here to the right is of the giftcard my sister and I made. It is not a folded card therefore the greeting is written on the back, which made it possible for us to laminate the giftcard. To this day the giftcard still hangs on the toy chest, which I can't deny amazes me.

Thursday, 28 February 2013

Christening Card with "A little Lovin"

 A couple of very dear friends of ours has been dog-sitting our Pepsi, while we were in Berlin, Germany. When I was texting with Anne about picking up Pepsi, she mentioned they were going to a Christening of a baby girl the coming weekend. I thought to myself what a perfect way to say Thank You by giving them a card to use for the Christening.

So I quickly made this card for them.... 


I don't have any stamps neither in English or Danish for Christenings, so I had to get creative on the computer. Luckily our printer can take rather thick paper, so the sentiment is simply a print from the computer. To be honest, I can't remember what fond I used. After printing the sentiment I used a SimonSaysStamp die to make the banner. This is the Sayings With Banner stamp & die set. I just didn't use any of the stamps.....they didn't quite fit the occasion.


Materials used:
  • Bazzill cardboard in the colour "Salmon" and "White".
  • Stamp from Paper Smooches "A little Lovin".
  • Sizzix Framelits Circles die for the stamped image.
  • Easy Punch size 5/8 inch for the frame around the stamped image.
  • Promarkers for stamped image: "Blush", "Cool Grey 4" and "Cool Grey 1".
  • Sentiment homemade on computer & printer.

Thanks for stopping by and letting me share my joy in crafting :o)